January One -- Toe Up
August 27, 2006
I got SKILLZ...they're MULTIPLYING!
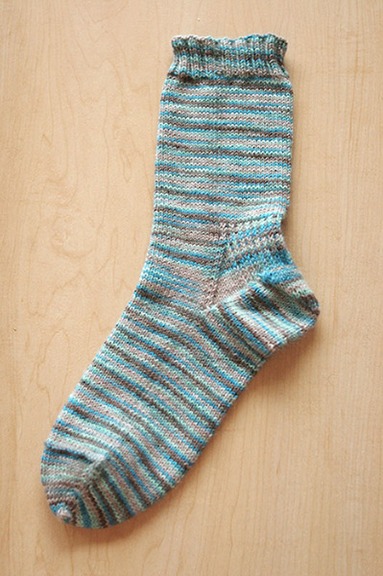
Let's add some new items to my knitting resume, shall we? I have made a toe-up sock.

Before we get into the knitty gritty of the construction, this sock was made with Socks That Rock, Pebble Beach colorway, in the OLD put up, so half of 325 yds. See that weird ridge right at the beginning of the toe? I've had some questions about it - that's my odd purl row to delineate the start of the toe decreases. I HATE the way a stockinette sock looks when it goes straight through to the end of the toe. I call it Gold Toe Syndrome. So I decided to put a purl ridge in there to break things up. It's only on the top of the foot and it's just one purl row. The next row is when I usually start my decreases (or in this case, the row after I finished my increases.) Oh and the shoes? I'm not sure where I bought them, but they are Naot Sea. If you google it I'm sure you can find them.
Okay. The sock. When last you found me, I was getting ready to throw away all my deeply held beliefs and make a short row heel. THANKFULLY, Deb, in the comments (GET THEE A BLOG DEB!) saved me from that woeful fate. She gave me a bunch of links to a FOURTH choice in the toe-up heel. Let's reiterate. There's the short row heel in all of it's incarnations - wraps, PGR, and a million others listed here. You've got your traditional heel flap heel as seen here and here and a million others here. And we can't forget the Afterthought heel.
I don't like the way the short row heel fits and I'm not really a fan of the method and the other toe up heel flap stuff seemed really really really fiddly. (Thanks LA!) And as far as the afterthought heel goes - I'd kind of like the socks to be all in one. There's something deeply satisfying about finishing with only two ends - one at the beginning, one at the end.
In stepped Deb. Deb of the comments. Deb who desperately needs a blog if only so I can link to her and tell everyone how amazingly helpful she is!!! Deb fielded like 80 emails from me Friday and was a saint about answering all of them and even asking her teenage daughters (who also make socks this way) their opinions on my options. Thank you ALL! Deb's suggestion is best illustrated by this pattern.
Did you look real fast? Looks almost exactly like the traditional top down heel flap doesn't it. Get this: IT IS!!! So, I knit until the foot met my leg and then I ripped a few rows, and I should probably have ripped a few more. As I usually do when working from the top down, I started my heel flap - only this time the heel was on the BOTTOM OF MY FOOT. The directions say that you can do a standard s1k1 heel flap (only it's a sole flap - way cooler) but I decided to do a stockinette flap - so I did s1 k to the end, s1 p to the end until the flap met with the edge of my heel. Then guess what I did? I TURNED THE FREAKING HEEL!!! Just like you do top down. I did my normal 32 stitch heel turn (which no matter how many times I do it I still have to check with Charlene Schurch to see how many stitches I need to knit before the first turn) and then I PICKED UP FOR THE GUSSET just like top down. CAN YOU BELIEVE IT!?!
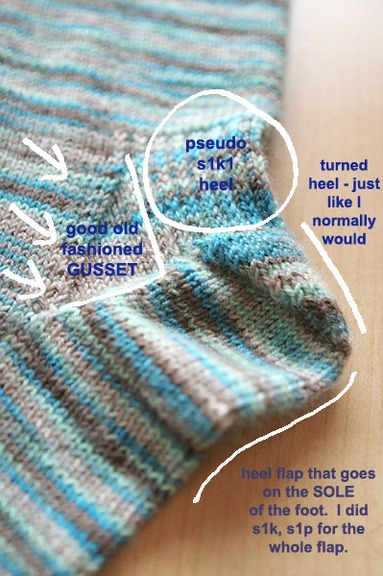
Click for a bigger view.
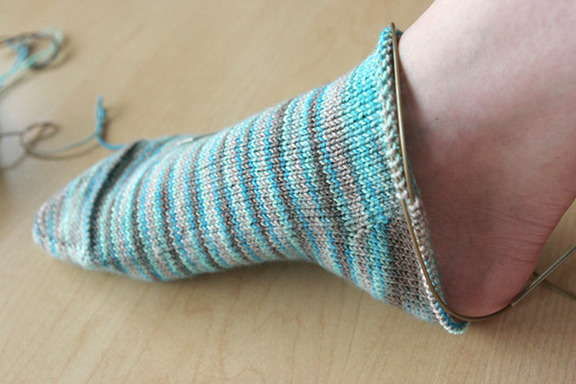
Once I started knitting the gusset (decreasing the same way I always do!) I knit the 32 stitches on the back of the heel in s1k1 so I could get the extra padding I love so much on my top down socks. I did that for all the of the decreases and a couple more rows until I had my normal "heel" flap. Want to see how it fits on my foot?
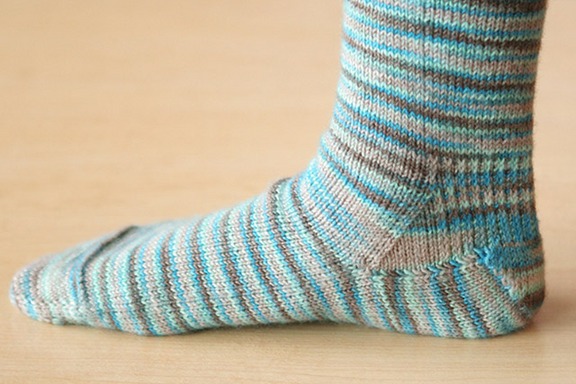
No. I don't bend that way. Picture taken by my lovely husband.
Want to see it compared with a regular top down heel flap?
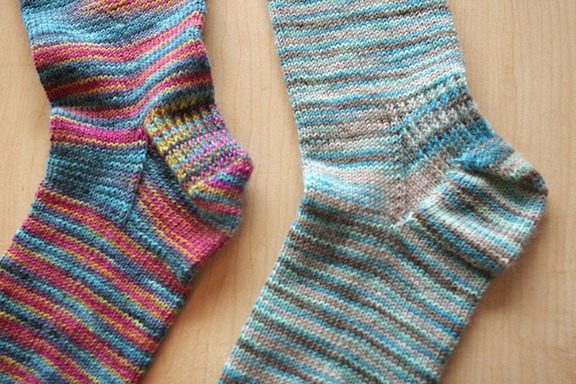
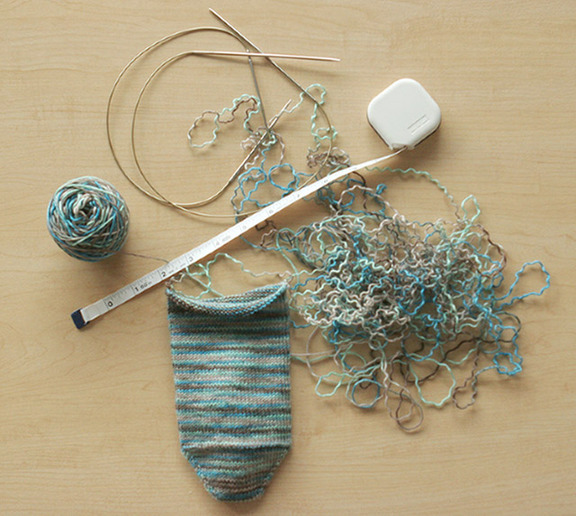
Neat, huh? Once I was done with my pseudo heel flap, I knit and knit and knit and then STILL had angst because I didn't know when I was ever going to run out of yarn and when should I start the ribbing? I know I know it's not like anything bad would happen (like running out of yarn at the toe) if I started it late and I could just rip until I got it right but where's the fun in that? Anyway, I guessed right and managed to get fifteen rows of ribbing in and then I did Elizabeth Zimmerman's Sewn Cast Off. I also used Julia's innovation of doing the cast off inside out to make a nicer edge on the front side. But guess what? The cast off edge is like a tourniquet! I don't know - maybe I did something wrong, but I don't think so. And I know that I'm known for my tight cast off (wait - you didn't know that? Yeah. I cast off pretty tight. I think it looks neater.) So I might rip it out and do something else, but for now I'll just leave it as it.
This is how much yarn I had left:
So, the toe-up method works for getting the most yarn out of your yarn. But, I'm not convinced. There's something off about this sock. I don't know if I can rightly identify it (besides the tight bind off) but it just feels different. I'm glad I did it, and I'm glad I did it the way I did it, but I still really really like the fit of my top down socks. I guess I'll do the mate to this one, and then I'll see. Now that I know how far up I can go with my 325yd skeins, I'm thinking the next pair will be top down.
Posted by Cara at 12:08 PM | Comments (35)
August 25, 2006
Don't be such a heel!
Thank you all so much for your sock heel suggestions. I've had a lot to think over in terms of these new-to-me toe-up socks. This is what they looked like this morning:
Please excuse my weird looking ankle. It's usually got a lot more shape than that. Funny angle probably.
And this is what the sock looks like now:
I'm going to take a bit of La's advice in the comments yesterday and go in a different direction. I'm so thrilled with my toe up toe - why not try the traditional toe up heel, no? Trust me if it works, I'll be asking for this recipe.
What'd ya think? Maybe a wrap for lunch? HAHAHAHAHAHAHAHAHAHAHAHAHAHAHAHA!
I crack myself up.
PS - Happy Birthday Sandy!
Posted by Cara at 10:36 AM | Comments (13)
August 24, 2006
The Miseducation of January One
Yesterday was all about the learnin'. I will share.
~~ When you change a password, best check what that changed password will affect. The comments are working now.
~~ Spin all your singles up at once. Then ply everything up at once. It will make for a more consistent finished yarn - especially given my newbie status.

I finished spinning up the 8 oz I had of Moonstone, merino roving from Spunky Eclectic. I was so looking forward to finishing this stuff up because I had grand grand plans for it! I was going to make my first handspun project from this yarn. And now that it's off the bobbins, I've got to say, I'm a bit disappointed. I should clarify - this has EVERYTHING to do with my spinning and NOTHING to do with the fiber. Of all the fiber I've spun (which is limited - I will admit) Spunky Eclectic is by far my favorite - for the color AND the prep. I was quite pleased with the first batch (see post here). I managed a nice tight ply and I liked that a lot. This time around, not so much.
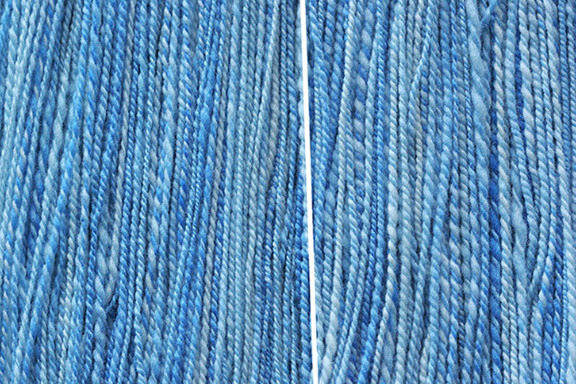
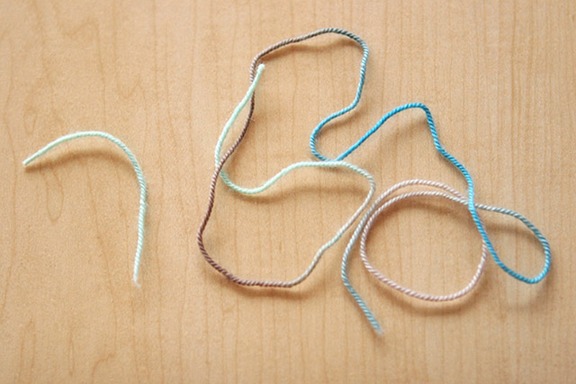
Can you see the difference?
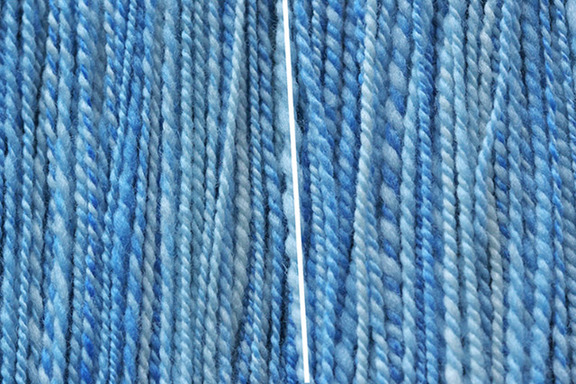
How about now?
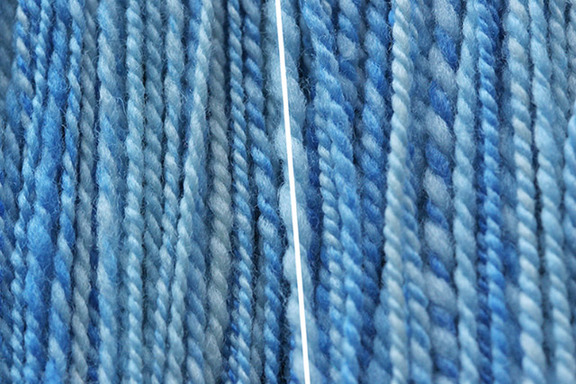
NOW?!? New yarn on the left, old yarn on the right.
The new yarn is not as tight at ALL. And therefore I think it looks a little loosy and sloppy. It's not as smooth. Although it looks a TON better now that it's been washed and dried. It's also a bit thinner. I finally see a reason for two wheels. Before you all either start laughing or groaning - how great would it be to have one wheel for plying - where I could keep the tension and everything JUST SO and then be spinning on another wheel where I could also keep the tension and everything JUST SO. As it is now, I'm going to have to spin up all of the singles and THEN start plying. Clearly I'm not good enough to go back and forth. I need the stability of keeping things JUST SO.
In the first batch I've got about 310 yds and the second batch I've got about 566 yds, so a decent amount. I had wanted to make a shawl with it - and I guess I still could - I could use the 310 yds at the top of the shawl - where it's a bit bigger, and then use the rest as it gets to the point. Any and all suggestions for about 800 yds of fingering weight (I'm guessing here) would be great. I'd love a pattern that shows off the yarn - so something with a bit of stockinette to it would be great.
Eh. I'll do better next time.
By the way - before I change topics - CJ asked me to mention a new swap she and Christina have put together: The Spinning Roving Swap. All information can be found at that link. I'm off swaps for a while now, but if I was going to get in on one - this looks really good. Different sign ups for people wanting to learn to spin, and for experienced spinners. Check it out.
~~ Don't be afraid to try new things.
I'm very reluctant to show you this:

Yup. It's a toe up sock - STR - Pebble Beach colorway - old put up. I had almost given up the other day when I had tried the Magic Cast On, Wendy's short row method and Purly's YO method. Then, yesterday in the comments (before I broke them), Rachel mentioned that I should try the Turkish Cast On. So I checked a couple tutorials and MY GOD. This is the most mind-blowingly easy thing I have ever tried. Just wrap the yarn around two needles and start knitting. Seriously. LOOK AT THIS TOE!
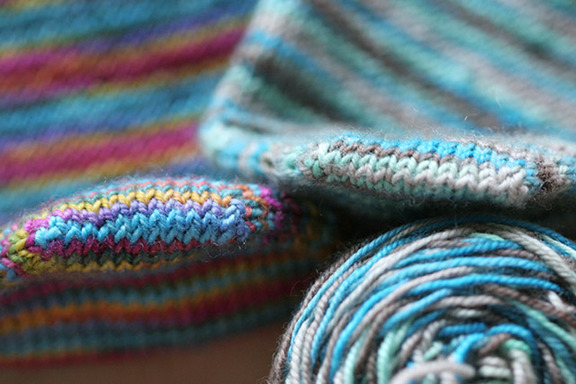
The top down knee high I just finished - kitchener stitch at the close - is on the left and the brand new toe up Turkish Cast On goodness is on the right. They barely look any different. All you toe up people - why would you use anything other than this cast on? Also, I love me some M1. I've mastered the right leaning M1 and the left leaning M1 and it's so much nicer (TO ME) than short rows. So much nicer. Check it out!
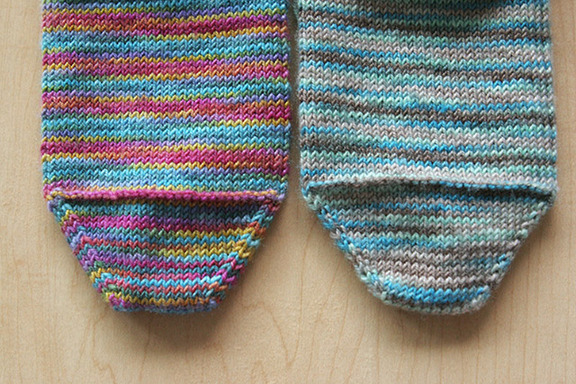
Again, top down on the left, toe up on the right. You can barely tell the difference. Recently I've learned that I like a wider toe. I start my toe decreases very late - almost at the top of my pinky toe, and then I decrease four stitches every other row until I have fourteen on the top of the toe and the bottom of the toe (28 altogether.) Then I slip the stitch right inside the outer stitches over the outer stitch (I read it somewhere - makes the toe a bit rounder and not as pointy on the edges) then kitchener the 24 remaining stitches. Perfection!
So yesterday, I cast on 24 stitches - 12 on the top, 12 on the bottom) and knit a couple rows then started increasing four stitches every other round until I got to 64. DONE! Perfection!
The jury is still out on these socks, though, because I really don't like a short row heel. So if I can't figure out the toe up heel flap - I don't know. This might be a 325 yd STR prototype and then I'll start knitting from the top down again. Question for anyone out there that has knit a toe up heel flap: When knitting from the top down, I generally have about 58 rows between my last gusset decrease and the start of my toe decreases. Is it the same when knitting toe up - should I start my gusset INCREASES at row 59 from the toe decreases? How do you know where to start the heel? THANK YOU!
Okay. I'm off to help my newbie again today. She's finished the bottom of her bag - I'm so proud. Unfortunately the dog ate my homework. I've done like 20 rows out of 66 on my own bag.
Have a great day!
Posted by Cara at 10:51 AM | Comments (45)